So you’ve finished a water-based clay sculpture or made a plaster mold off of one, and it’s dry! Hopefully it didn’t crack in the drying process. I’ve discovered patience is the main secret to success, but if you are having trouble, you might want to read my post of tips to help avoid cracking.

Once your sculpture is dry, the next step is either to make a latex mold (along with a plaster mother mold), so you can pour a plaster replica, or fire it in a kiln, or you can simply stain it as it is. Be warned though, that I’ve found non-fired sculptures to be very fragile. One bump or fall, and your piece could be badly damaged. I am planning to buy a special art school quality self-hardening clay (not the kind you buy in hobby stores), to make my next sculptures in. However, I have 50 pounds of the basic cheap clay, so I need to use that up first. I bought 50 pounds of Laguna’s WED Clay for $50 (price with shipping) but the self-hardening clay on Amazon was $25.00 for 10 pounds. I’m reading a Kiln building book right now because obviously, this could add up fast!

Once you have a final piece, you will want to add a patina or faux surface of some kind to make it look finished. 🙂 There are as many ways to put on a patina as there are colors and finishes to copy. It’s not at all an exact science.

Just to clarify, I’m not referring to metal patinas. You have to use those on metal sculptures. I’m talking about staining a sculpture with watered-down acrylic paint, or using other materials like coffee, tea, wood stain, or even iron liquid to color the surface. You often use wax paste to seal one layer of color before applying the next layer. Some people seal the sculpture with acrylic sealant and then apply paint on top. Personally, I want the color to look more natural so I aim for ‘staining’ rather than painting.

Louis Slobodkin says it’s really somewhat of a waste to bother staining a clay or plaster statue because ‘real’ sculpture should be made of very durable materials. Clay is used to make a model or ‘maquette’ from which to carve the ‘real sculpture’. But even he acknowledged that some of us amateurs might be very attached to our first clay sculptures and want to finish them somewhat. He covers some of those techniques in his book Sculpture Principles and Practice.
I researched all over the internet, read bits from my sculpture library, and watched videos and came up with a few ‘recipes’ of my own. You can see the results of my experimentation here.
For the 10 Commandments tablets, I wanted to make a faux stone surface. Unfortunately, even though I have a stock of practice tiles to experiment on, I never quite seem to end up with exactly what I had in mind. I’ve learned to just take what I get in the end. It always looks pretty good and I know I’ll get better over time.
Materials:
- Black acrylic paint
- White Acrylic Paint
- 3″ brush (from Lowes)
- 3-4 water jars or glasses
- Practice Tiles: dried clay pieces to experiment on
Directions:

Step 1: Prepare Paint Colors and Thin
First, I filled several jars with about 1/2 cup of water each. I wasn’t sure how dark I wanted the black to be or how much gray to use or if I even wanted to add white highlights.

My general process for staining is to water down the base color so that it will mostly soak into my clay surface which is bone dry. My goal is to not have a lot of paint actually on the surface but rather to have the thinned watery paint/water to soak into it fairly deeply (about a 1/8-1/4″)–so it looks like the clay was originally that color. For some patinas, you would actually want to have the paint closer to it’s original thickness, or you could even spray paint the object. That would be especially true for metallic patinas.

I played around with different combinations of black and white and came up with a gray I liked. I painted several tiles with various amounts of gray paint–some only one layer, some several layers.

Note: Practice tiles are so handy to have prepared! All I did to make them is roll out clay about 1/4″ thick, press some textures into it, like bumpy rocks, doilies, etc. I rolled it out just like pie crust in layers of saran wrap. Then I applied the textures, then I cut the ‘dough’ into strips and let the pieces dry. I have a whole ziplock bag of tiles just waiting to test out stains on!

Step 2: Apply the Base Stain/Color (On Pre-made practice tiles if you have some.)
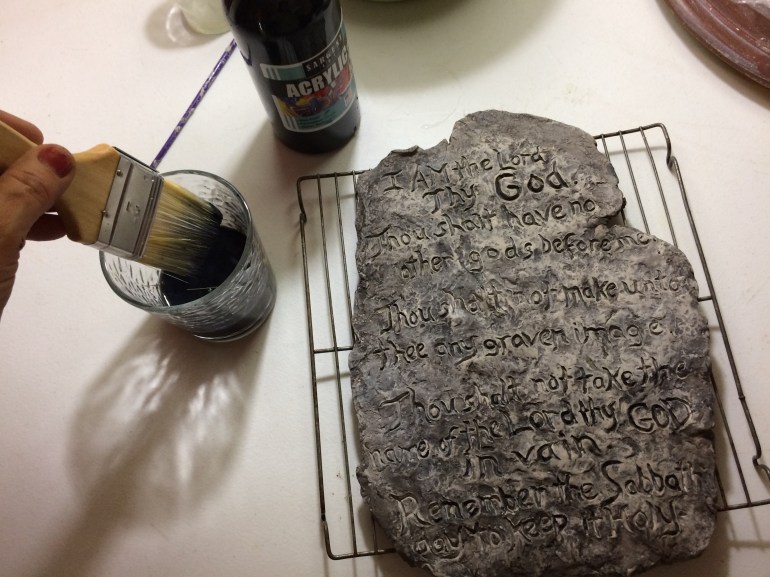
I painted both sculpture plates gray on the front and back and let them thoroughly dry.


I painted it in a variety of brush strokes and layers so it would have darker and lighter areas and add some variety and interest plus some added depth.
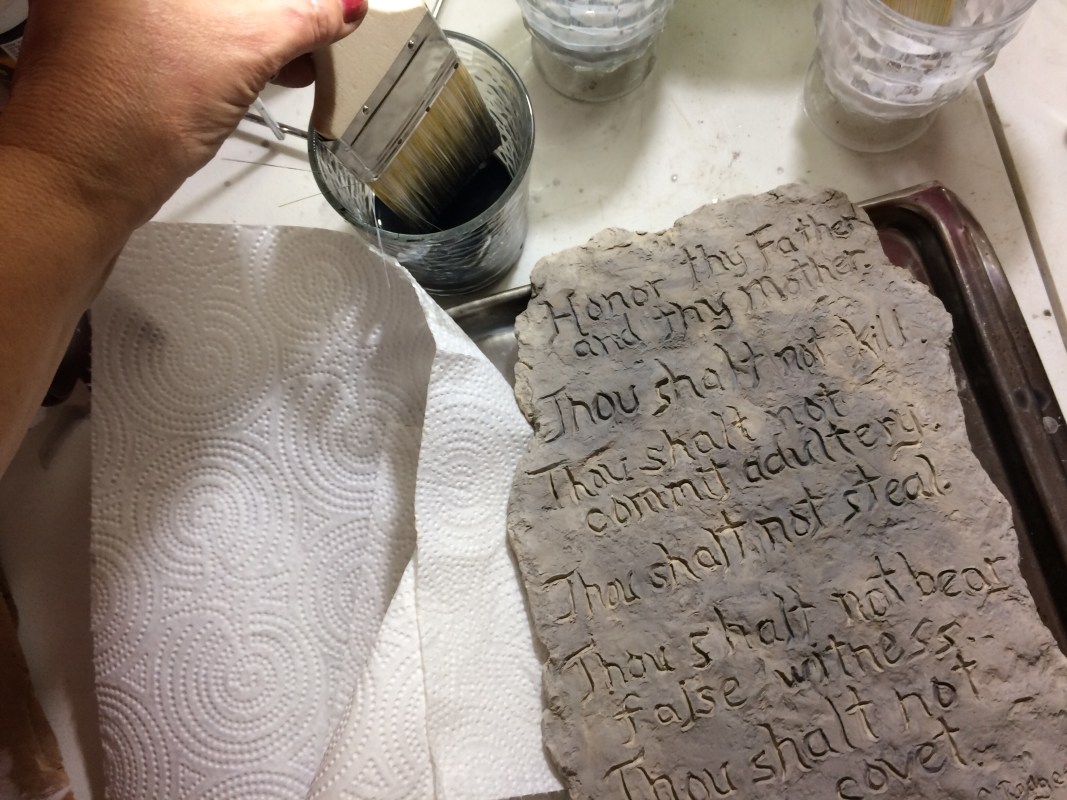
Step 3: ‘Stain’ the Details
Next, I made my contrast stain using black paint and water. I wanted it as thin as possible but dark enough that some paint shows. The purpose of the contrasting black stain is to pour into the cracks and crevices, particularly the letters, so that they stand out from the grayish background. Note: If you prop things up vertically to stain, it can show drips. For this project, I laid the plates flat then sponged/wiped the surface with a paper towel to avoid the drip effect.


Step 4: Wipe Off the Stain
Then, as soon as you have poured the ‘stain’ onto your sculpture surface and let it soak in a minute or so, pour off any left over stain and wipe off the surface very gently with a paper towel. The gray surface was now a different color than just solid gray. It became a blend of black and gray with highlights where some of the raw clay might even show through.
I was aiming for variety which is much more interesting and aesthetic than a solid painted surface in my opinion. You might prefer to do it differently. It’s really up to you! Do you like it? Do what appeals to you and most likely, other people will like it too. 🙂 I did this process in various ways on the practice tiles until I got a look that I liked.
Step 5: Choose the stain ‘recipe’ you like best and apply to your statue. (Repeat the above steps.)
Finally, I followed that process or ‘recipe’ as we call it, on the two stone tablets (as seen in the photos above). I painted and stained the back of each one first just to see how it turned out before doing the front.
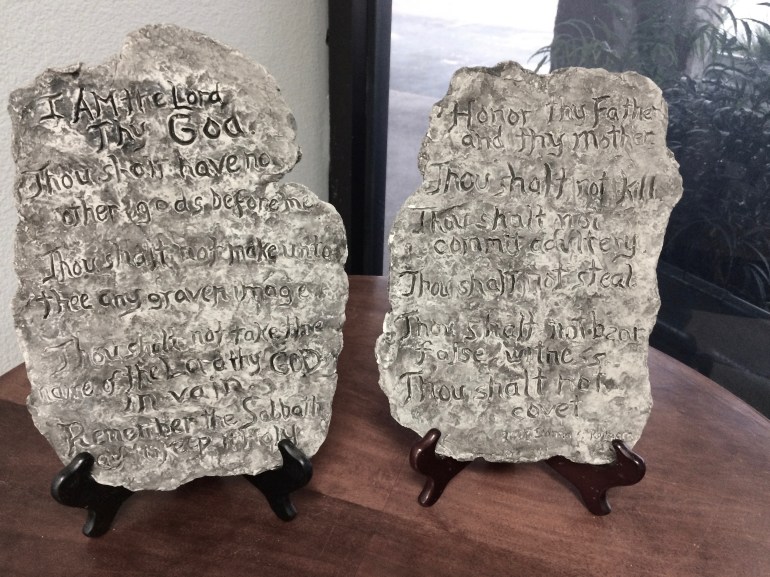
I feel like I should have added one more coat to the right tablet, but everyone said it looked fine. The hard part for me is stopping before I’ve done too much and made a mess of it. If you get in too much of a hurry and the layers don’t dry, you could end up with a muddy mess. I know–I’ve done it! The nice thing about practicing on bits and pieces of clay is to avoid that before actually staining your final piece.
Enjoy!
Donna
